darktable article lede image

tag: Development

local laplacian pyramids

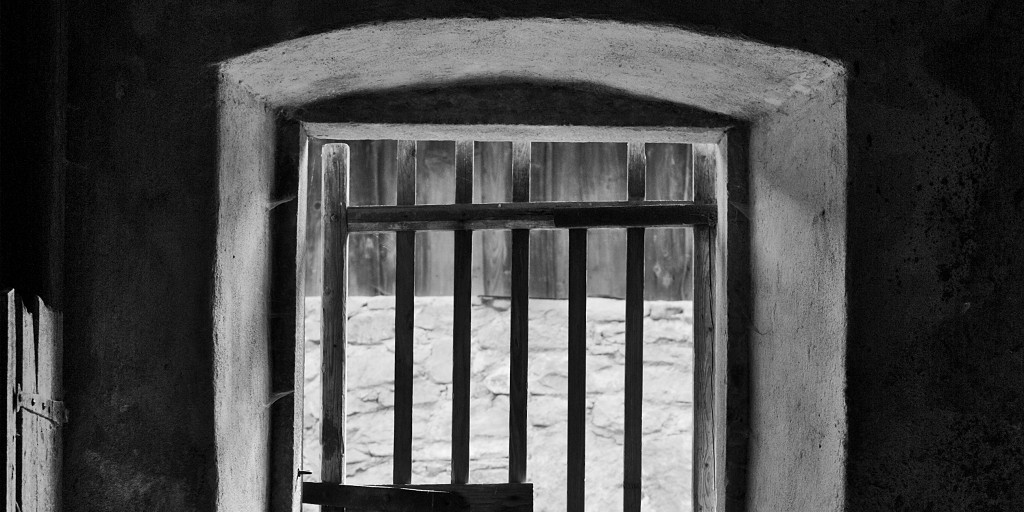
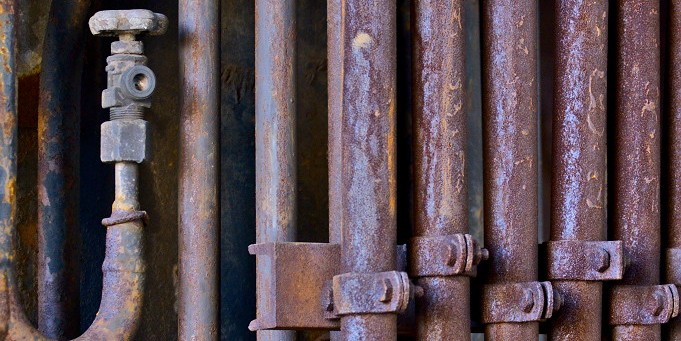
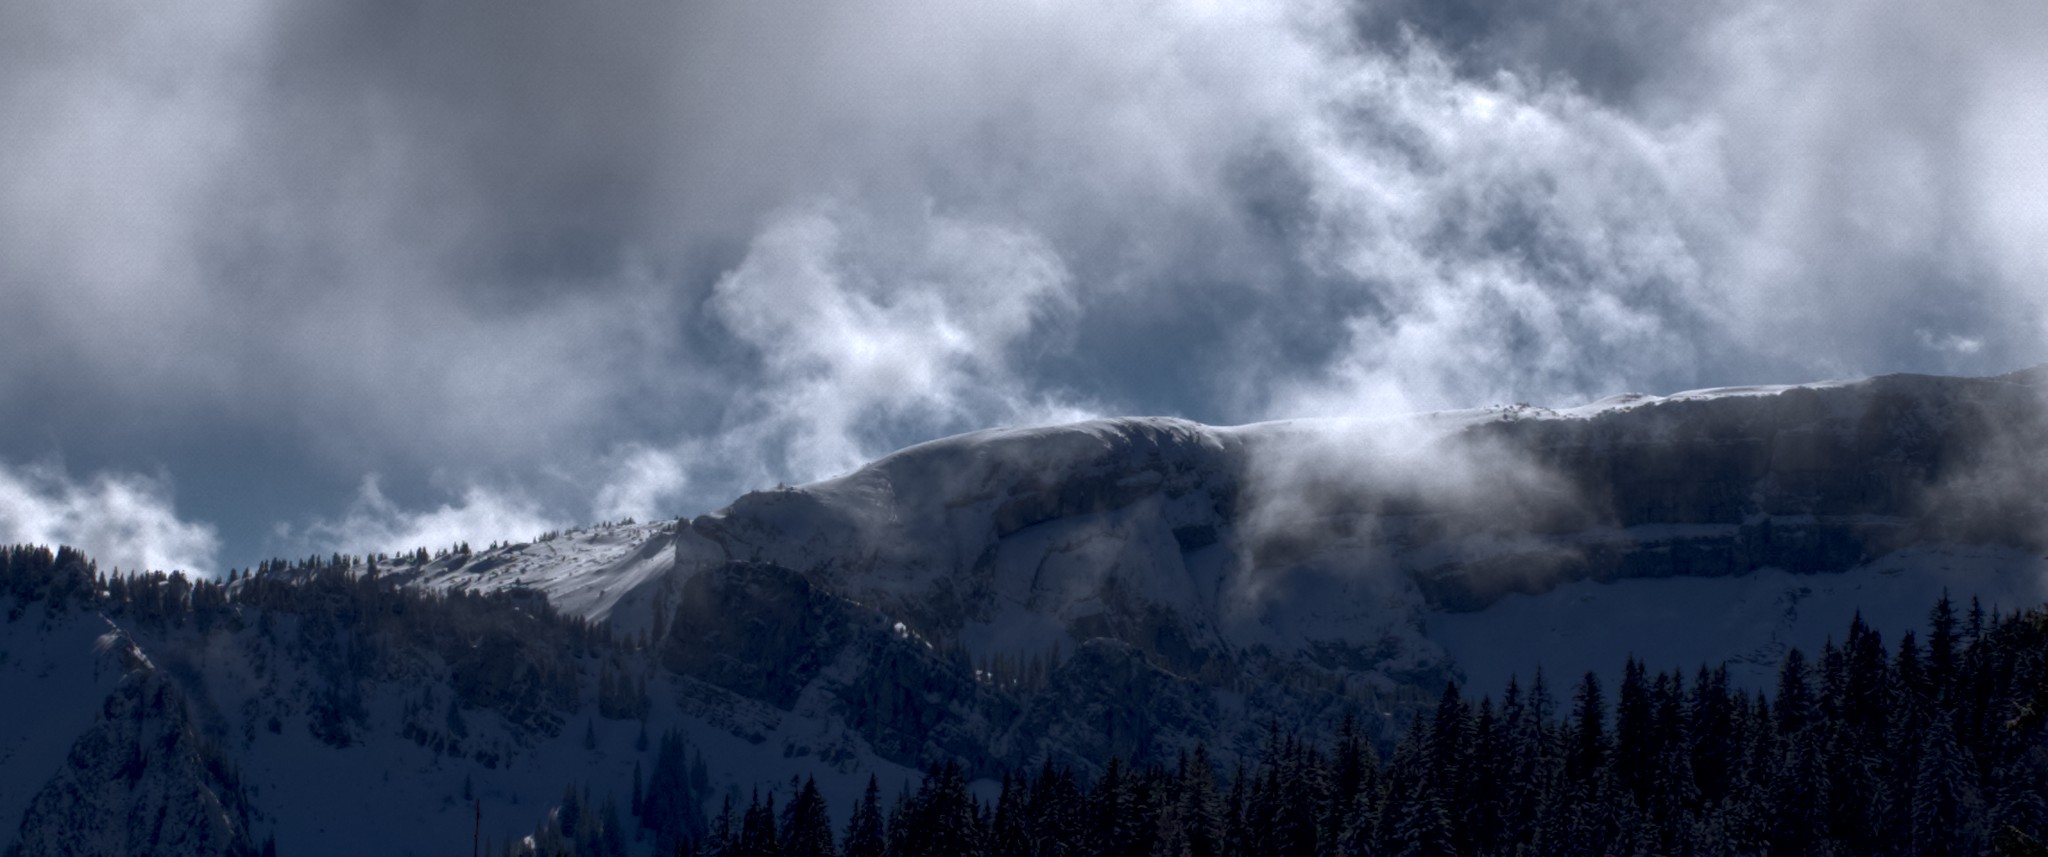
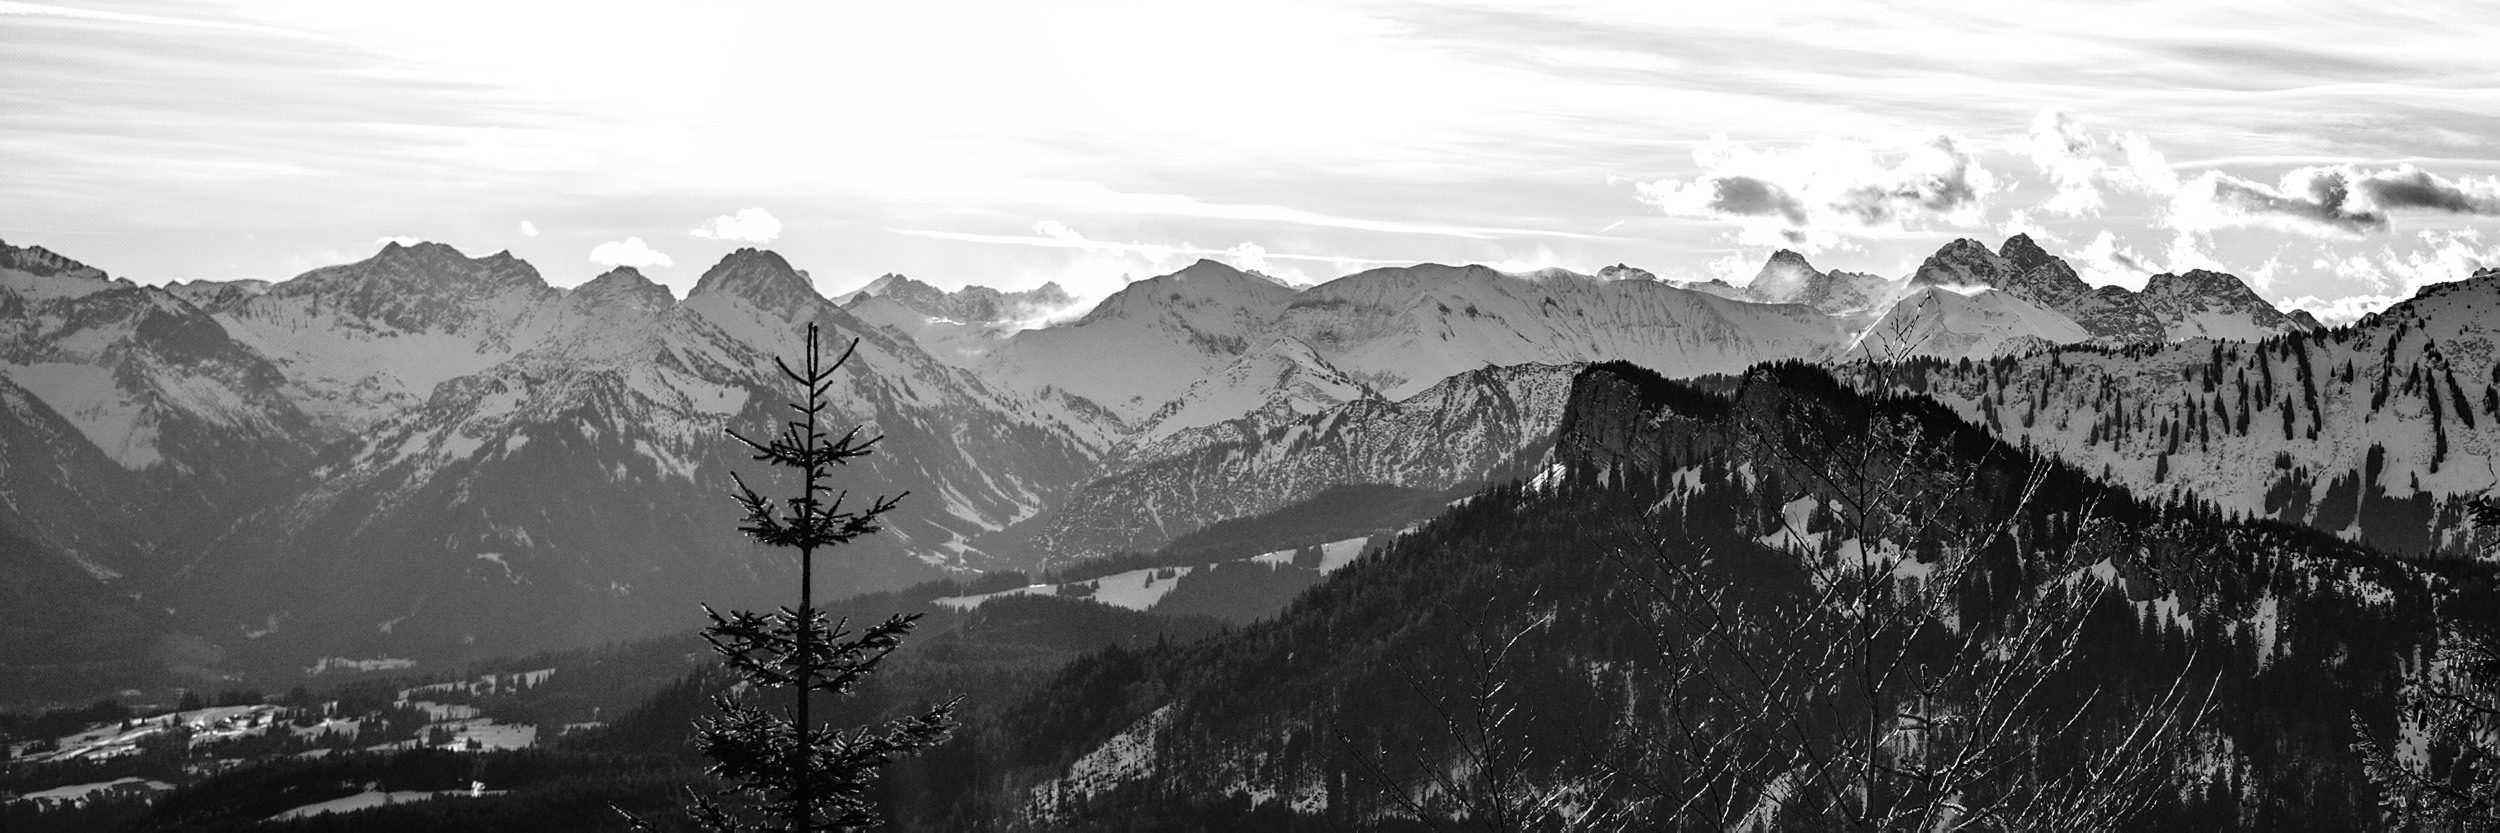
improving contrast with the local laplacian filter 
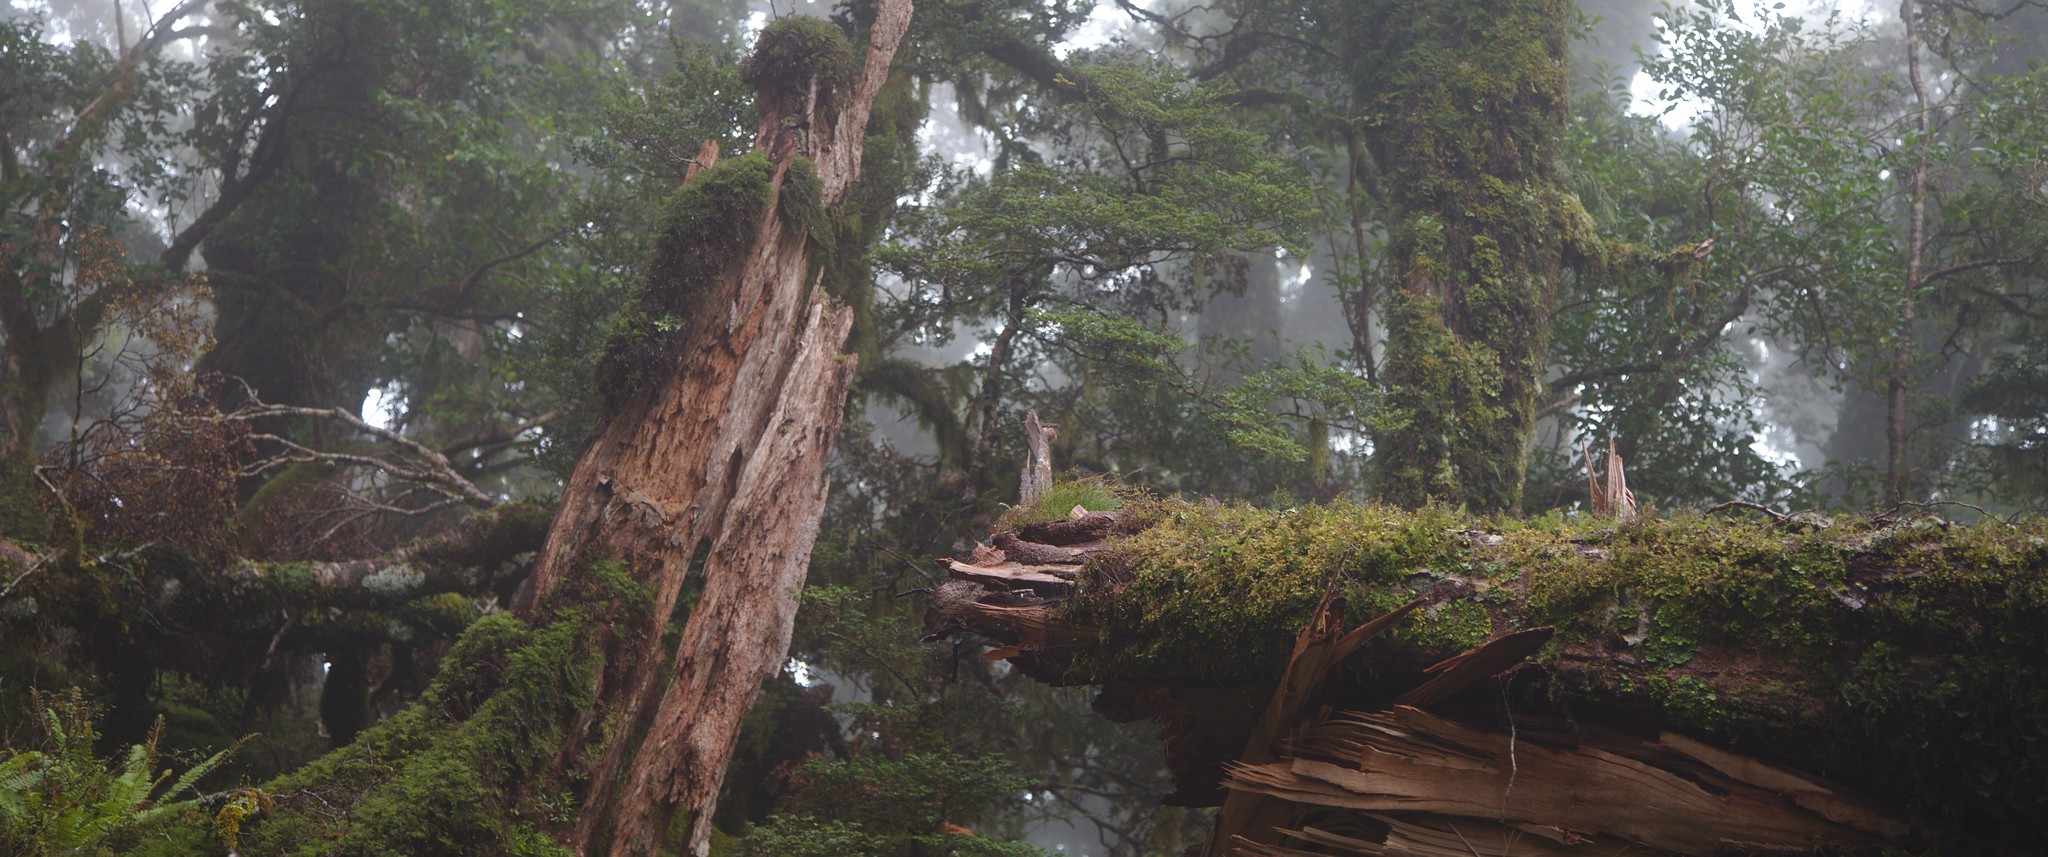
sometimes difficult lighting situations arise which, when taking photographs, result in unappealing pictures. for instance very uniform lighting on a cloudy day may give dull results, while very contrasty illumination (such as back lit) may require to compress the contrast to embrace both highlights and shadows in the limited dynamic range of the output device. refer to the following two shots as examples:

Visualizing the raw (sensor) highlight clipping

Have you ever over-exposed your images? Have you ever noticed that your images look flat and dull after you apply negative exposure compensation? Even though the over/underexposed warning says there is no overexposure? Have you ever wondered what is going on? Read on. the problem First, why would you want to know which pixels are overexposed, clipped? Consider this image: … Why is the sky so white? Why is the image so flat and dull?

compressing dynamic range with exposure fusion

modern sensor capture an astonishing dynamic range, namely some sony sensors or canon with magic lantern’s dual iso feature. this is in a range where the image has to be processed carefully to display it in pleasing ways on a monitor, let alone the limited dynamic range of print media. example images use graduated density filter to brighten foreground using the graudated density iop works well in this case since the horizon here is more or less straight, so we can easily mask it out with a simple gradient in the graduated density module.

colour manipulation with the colour checker lut module

[update 2016/07/31: there was a section about intermediate export to csv and manually changing that file. this is no longer needed, exporting the style directly from darktable-chart is fine now.] motivation for raw photography there exist great presets for nice colour rendition: in-camera colour processing such as canon picture styles fuji film-emulation-like presets (provia velvia astia classic-chrome) pat david’s film emulation luts unfortunately these are eat-it-or-die canned styles or icc lut profiles.

Running on non-x86 platforms

For many years darktable would only run on x86 CPUs that also support at least SSE2. While that is nowadays almost everything looking like a PC it’s still limiting. Consequently Roman sat down and started work on dropping that hard requirement. While his work isn’t complete yet it’s definitely becoming useful. So with a little tweaking you can for example use the development versions on an ARM, like the Raspberry Pi.

A new module for automatic perspective correction

Since many years darktable offers a versatile tool for manual perspective correction in the crop & rotate module [1]. Although the principle is simple and straightforward, there are cases where it can prove difficult to get a convincing correction, especially if no distinct vertical or horizontal features can be spotted in the image. To overcome these limitations a new “perspective correction” module has just been added that is able to automatically correct for converging lines.

Introducing the darktable app store

Today we are happy to announce a big new feature that we will not only ship with the big 2.0 release later this year but also with our next point release, 1.6.4, which is due in about a week: even more darkroom modules! One of the big strengths of darktable has always been its varied selection of modules to tweak your image. However, that has also been one of the main points of criticism: too much, too many and too complicated to grasp.

Color Reconstruction

If you overexpose a photo with your digital camera you are in trouble. That’s what most photography related textbooks tell you – and it’s true. So you better pay close attention to your camera’s metering while shooting. However, what to do when the “bad thing” happened and you got this one non-repeatable shot, which is so absolutely brilliant, but unfortunately has some ugly signs of overexposure? In this blog article I’d like to summarize how darktable can help you to repair overexposed images as much as possible.

Using X-Trans cameras with darktable

There is now a development branch of darktable with experimental support for raw files from many recent Fujifilm cameras. These cameras include those with the X-Trans sensor (X-Pro1, X-E1, X20, X100S, X-M1, XQ1, X-E2, and X-T1), X-Series cameras with conventional sensors (X100, X10, X-S1, XF-1, X-A1), and some from Fujifilm’s other lines (S6000fd, E550, IS-1, S3Pro, S5Pro, S5600, E900, S2Pro, S5000, S5200, S5500, S6500fd, S9500, S9600, S9600fd). Previously, darktable would fail to read RAF-type raw files produced by these cameras.

masks

In darktable, selective editing was a long awaited feature. Our development version now allow limiting module effects to a region of the image. Remember the old times, the red light of the darkroom, the smell of the developing bath … Remember when you were using your hands or a small piece of cardboard to achieve some masking … Now you can do that in darktable. example let take this photo as an example.

Color Mapping

I’d like to give a few words on a new module named “color mapping” that is currently under development in our master branch. This module is a rework and enhancement of the older “color transfer” module. That older module had several issues which made a migration impossible. So we leave the old one behind as deprecated (old history stack still work as before) and for all new history stacks “color mapping” should be used instead.

multi-instances

One of the upcoming new feature in darktable is the ability to use the same development module several times. By applying the same module multiple times and combining them with blendif it is possible to do some effects that could not be achieved previously without using external tools like the gimp. Modules that can be instantiated multiple times have a new icon in their header, next to the “reset” button. Clicking that icon will open a pop-up menu that allows you to create a new instance of the module, change the order in which the different instances are applied, or delete an instance of the module.

Importing Lightroom Development

One of the most time consuming work for any photographer is probably the development process. Lot of time behind a computer screen to adjust the curves, the contrast, the colors, the sharpness… All these are application specific, that is, the development process done with Lightroom is not compatible with AfterShot Pro or darktable (to name just few raw processing softwares around). This makes it really difficult to move from one software to another.

profiling sensor and photon noise

… and how to get rid of it. [update 02/05/2018 The information how to create camera noise profiles is outdated please read this tutorial instead!] [update 20/12/2012: ‘how to profile your camera’ includes instructions with the new gen-profile script] [update 15/12/2012: no more recompile needed, updated the instructions in the benchmark section and how to run make.sh.] to summarize the current situation in dt: we have a lot of cool tools wrapped around great algorithms with almost all the knobs you need to get perfect results.

edge aware image development

in an ideal world, an image is piecewise smooth. it has soft gradients, some detail and edges. in particular there’s no noise and the edges are sharp. given these assumptions, you can do a lot of cool things to your pictures, using techniques like frequency space editing, wavelets, or local histograms. darktable’s equalizer module demonstrates some of this, using the wavelet approach. you can use it to sharpen and denoise, enhance or attenuate certain frequencies in your image, while keeping the edges intact.

Bringing current darktable to OS X

darktable has been software of my choice for raw photo development for quite some time now, I’ve occasionally submitted bug reports and patches and kept an eye on current development by using git master version. My main operating system is Linux, which is the priority target of darktable support, but recently I bought MacBook Air to take with me on trips and such. Also my current project at work consists of porting a library to OS X, so this presented to me as a great opportunity to contribute to one of my favorite open-source projects and make darktable work reliably on Macs.

Some enhancements to conditional blending

Conditional blending, also known as “blend if”, is a feature which is currently under development in our master branch. A general description of the idea together with some examples can be found here. In short, conditional blending allows you to limit the effect of a module to certain pixels of an image, determined by their color coordinates. For modules in Lab space, you can restrict the effect of a module depending on the pixel’s L, a, and b value.

Exporting images on the command line

Recent builds from git will bring you a new executable, “darktable-cli”. With this tool you can export images using the processing power of darktable on the command line. The simplest way to call the utility is darktable-cli <input> <output> This will take the input image, look for the XMP file associated with it, process it at maximal resolution and write the output to output, trying to guess the output format from the output filename.

Upcoming features: New interpolation modes and better resize

darktable is all about providing you the best tools in order to get the most out of your photographies. This blog entry will explain how an existing feature can help you get more detailed exports and it will try to give you a glimpse of what is cooking in an unscheduled but upcoming version of darktable for even better detail preservation. Make sure to enable High Quality Resampling for exporting your photographies In darktable, the pixel pipeline is responsible for processing your photography from demosaic up to the point it is passed over to the output subsystem (saving in tiff, jpeg…).

Live view

For quite some time darktable supports tethering your camera. What was missing all the time was live view. This is about to change though. If you use master (and have a camera supporting it) you can now either use the eye button in the “camera settings” module or hit ‘v’ on your keyboard to start live view from within tethering mode. Since the preview is scaled to fit your screen it might be a good idea to hide some of the side panels.

Upcoming features: Conditional Blending

or “If one slider is not enough” Diligent readers of our small blog series are already aware of the blending feature that darktable offers as part of many modules. Instead of just handing over their result to the subsequent module in pixelpipe, “blending modules” take a moment to reconsider. Based on the blend setting they will take their original output together with their input and do a re-processing. As an example refer to here, where we took blend mode “overlay” with module “lowpass” to do shadow recovery.

darktable and OpenCL (updated)

Many readers will have already heard about GPU processing and the fact that darktable can make use of OpenCL to improve performance. As we still lack a detailed documentation of that topic, please find here a few explanations and howtos. The Background Processing high resolution images belongs to the more demanding tasks in modern computing. Both, in terms of memory requirements and in terms of CPU power, getting the best out of a typical 15, 20 or 25 Megapixel image can quickly bring your computer to its limits.

bauhaus widgets

disclaimer: this is only to tease you and will not make it into the next release, but the one after … when reading gui-guidelines, most of them seem to be too general, or too specific for a certain kind of programming environment (gnome and gtk, qt, etc). for our purposes, i found the fundamental principles of the bauhaus school to be more appropriate. radical simplicity, no unnecessary shape or line, such as a pseudo 3d-bevel-border around ui elements.

Shadow recovery revisited

One of the remaining shortcomings of digital cameras is their rather low dynamic range in comparison to analog – especially black-and-white – film. Scenes with strong differences between highlights and shadows are very difficult to capture. Even if they are exposed properly with no blown-out highlights they will too often only give acceptable results after extensive post-processing. Fortunately, darktable is progressing with a high pace. Some days ago I wrote an article on how to recover shadows with a technique using lowpass filter plus blend mode (" Using lowpass filter to recover shadows ").

Using lowpass filter to recover shadows

Outdoor photographers are often confronted with unfavorable light conditions. This often entails too high contrast. Two of the most frequent consequences are blown highlights and deep shadows in your digital images. Overexposed highlights are challenging to repair in digital post post-processing, still darktable offers a decent set of valuable tools as long as you take your pictures in raw (see Jo’s blog post “ why you want raw ”). Fortunately, it’s much easier to take care of the deep shadows.

Mastering color with Lab tone curves

or “How to bring the jungle back” Since its early beginnings darktable has a tone curve module that is able to alter the gray level distribution of an image. Recently we did an enhancement: tone curve is now able to control the full Lab color space with separate curves for the L, a and b channel. People who are used to curve tools in RGB, at first might get puzzled over the results of these three curves; they show marked differences to the typical RGB curve.

darktable and research

you might have noticed our equalizer tool, and been confused by it and the many controls. that’s probably partly because you didn’t see a similar thing before, we had to develop it first. very short history behind the ui is a powerful frequency domain processing technique, based on wavelets. the most commonly used wavelets are based on the lifting scheme [swe97], work in a data-independent way, and are decimated (i.e. the coarse coefficients are much more sparse than the fine ones).

a new caching backend

since i probably tend to make this more technical than any reader would like to, here’s the take home message: much faster import of folders much faster thumbnail creation for first-time images much improved scalability wrt concurrency much improved scalability wrt total number of images in your database (should be good up to around 500 million images) much improved robustness (no more deleting ~/.cache/darktable/mipmaps all the time, yay) some context: darktable’s light table mode shows you your image collection in arbitrary order and filtered by arbitrary queries to the underlying database.

That other OS

The last time I posted to this blog it was my April Fool’s Joke about a file manager (which happened to be just an embedded shell). Since a few people didn’t like that at all I want to assure you that this is no joke at all. However, if you are a Windows user and feel easily offended, then stop reading now. Still here? Great. I managed to compile darktable for Windows.

File management

Whoever has followed the mailing lists or IRC has seen remarks that darktable lacks a feature complete file manager. Currently we only have a button which lets the user delete files from disk, but there is no way to move them, copy them, rename them, … Every time someone has shown up to suggest something beyond that we made clear that “darktable is not a file manager”. We even have a FAQ entry about that.

darktable user manual revisited

Up till recently the usermanual has been only available for those who got the source and the necessary tools to generate and even than it would generate a HUGE pdf file due to the amount of high resolution of screenshots. I revisited the build system with the goals of shrink-en the size of the final PDF and to produce an html output that could be integrated in our website.

“Hello, world!”&nbsp;– yet another new blog?

“Why does darktable need a blog?” you might ask. The answer is quite simple: While we do have a mailing list (actually there are three) which is quite active, most decisions and background informations happen in IRC (#darktable on FreeNode). This is great for fast communications, but it doesn’t allow interested users to follow what we actually (want to) do. I hope that this blog will be an annotated commit log on the one hand showing the progress we make and a persistent archive of important decisions taken by us on the other hand.

Why GIMP doesn’t play well with darktable

Every now and then the question arises why we don’t have a button in darktable to open the current image in GIMP. Everytime I answer more or less the same. The arguments of those requesting the button are along the line of “$PROGRAM has it, so it shouldn’t be hard to do” and “I really need to do some small retouching, so it would save me lots of time”. Well, to understand why we don’t have it I have to stress two features of darktable.