Introduction
This blog post will go through a simple workflow when working with high dynamic ranged images using darktable and the modules for processing, you need use darktable 1.1RC for this guide. The example image used in the screenshots can be downloaded at following link: AtriumMorning
How to make an HDR image
I’m not going into details of the process of making an HDR image, there are many guides out there describing manual methods or automatic ones which some cameras have, but basically, take a bracket shot of your scene and import them into darktable and do no processing at all, export to 16bit tiff and import the tiff files into luminance hdr where you use its align and merge HDR functionality, when HDR is merged and cooked just save the image as EXR image format which you load into darktable for further processing.
Processing the HDR image using darktable
Step 1
load your HDR image into darktable, and enter darkroom, the image will probably look very strange and the first thing is disable all auto applied modules by selecting the “active group” and turn off all modules.
Step 2
the first thing to do now is to settle a base for further processing correcting the image exposure, the approach differs between processing a day or night shoot. If you have a night shot with a few light sources you should now correct the exposure of the light source to bring back as much detail into light source without lowering its intensity so it end up looking dull. If you process a daylight shoot for example a room with windows where you have a indoor scene and sunlit outdoor scene, the approach will be to adjust exposure so the darkest part of the image eg. shadows contains details and have a nice dark tone. This is just a starting point for both night and day shoots, you will likely get back to this step for fine tuning the end result so don’t spend too much time on this step for now, just do a rough estimation of what you think you want according to the 2 approaches described above.
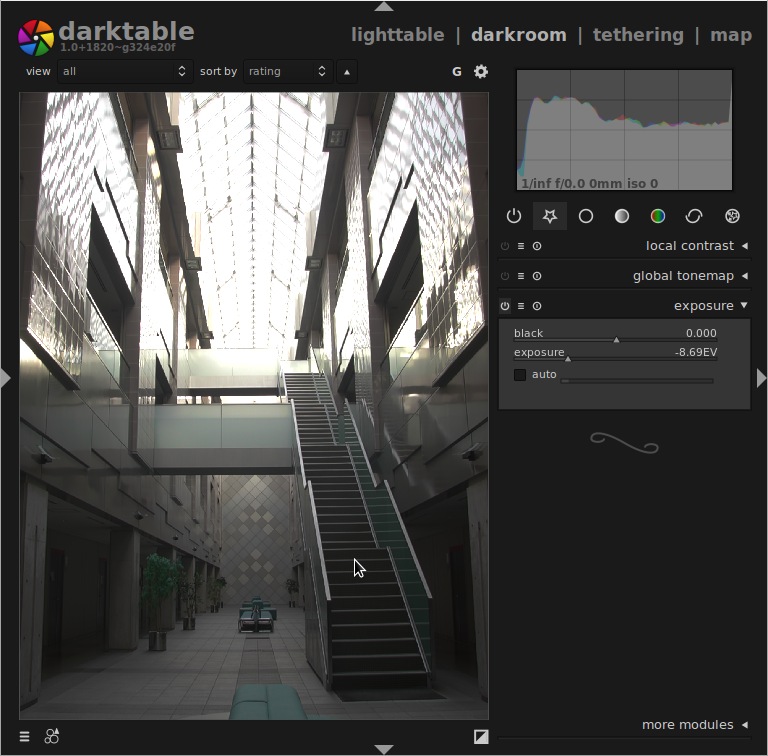
Step 3
we should now apply a tone map operator, which purpose is to compress a high dynamic ranged image into a lower range suitable for display on screen etc. There are 2 variants of tone map operators, global and local, local tone map operators tries to preserve contrast, some is better than others but in general will make the image look unrealistic and are commonly used to do “artistic” HDR images. This blog post is not about doing cartoons and therefore i will not go though a process of doing such thing. At our hands we have ‘global tonemap’ module in darktable which has 3 standard implementations of tonemappers, reinhard, filmic response curve and drago. The choice of operator is just a choice of what get closest to what you want. All three of them have their own pros and cons but is usable in both day and night shoots, I use all three of them depending of what result I’m after. Choose a global tone map operator and tune available controls to your like, if you processing a day shot you want to bring details in highlights and if you are on a night shot the shadows are what you aim to bring back. You will probably depending on tone map operator choice and its controls go back to step 2 to fine tune the exposure. The detail slider within the global tonemap module will try to recover some contrast details which is lost in the tonemap operation.
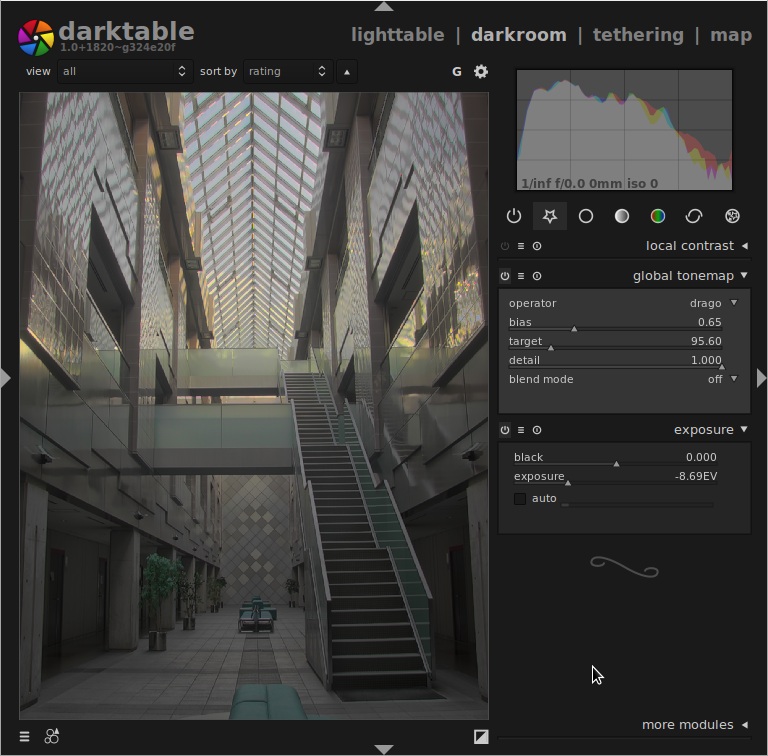
Step 4
the image can sometimes look somewhat dull and local contrast enhancement comes to the rescue, darktable have 2 approaches of local contrast, the equalizer can enhance contrast locally and the module named local contrast which at the time writing only is available in the source repo but will be available in the next release of darktable.
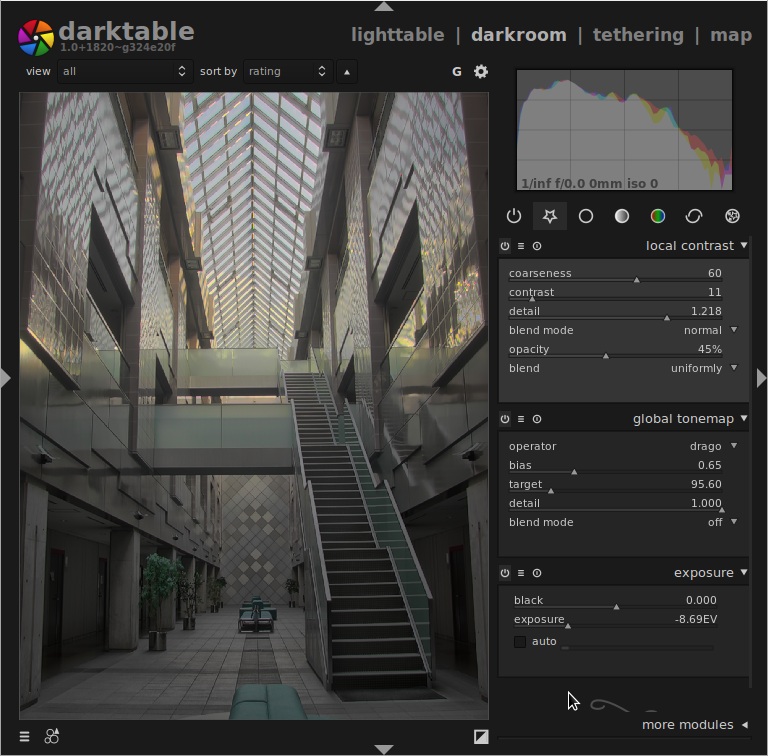
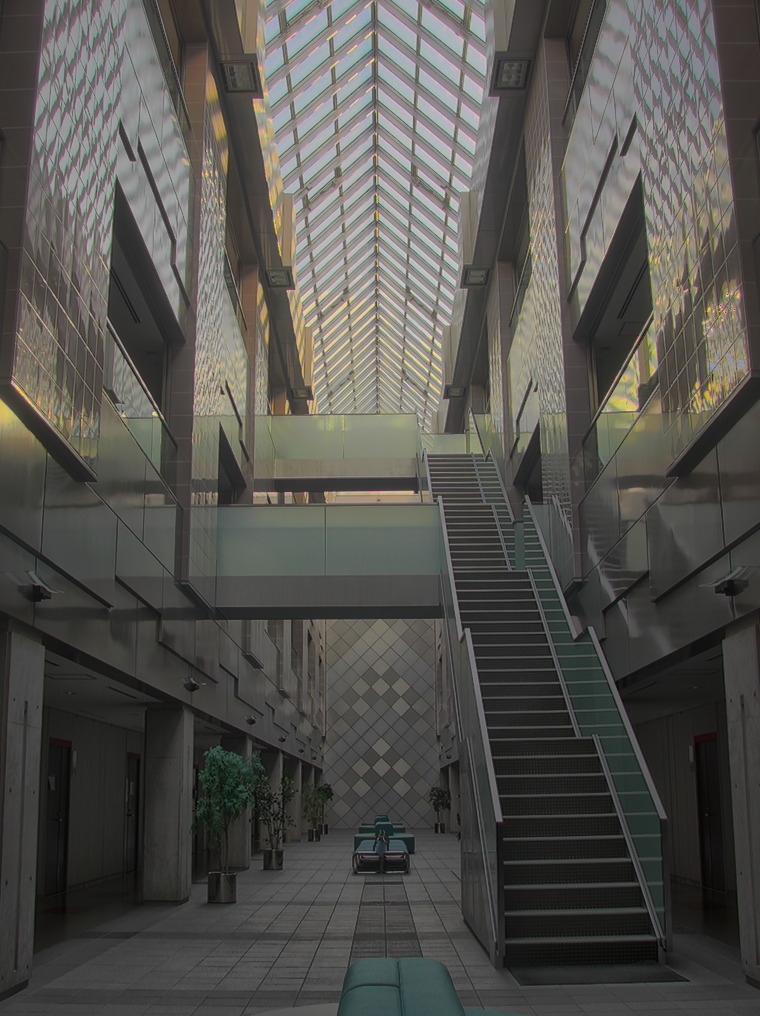
Additionally, you can use any module to enhance the image in the way you want. Play around and you will find how to get closer to the end result you are searching for, but remember not to touch exposure slider when you archived the result from above steps, that will ruin the process and you will have to start over from begin.



1.0.x was a series of point releases for bugfixes. it lacked all our cool new features, 1.1 will be very different.
good point with the hdr default presets, we should totally remove all of those. this needs some work (already in progress) to maintain backward compatibility though.
as mentioned in another post( http://www.darktable.org/2012/09/edge-aware-image-development/ ), the tonemapping module itself has a `detail slider' now, which tries to put back the local contrast you lose in the process of flattening out your contrast.
as another sidenote, darktable can also create hdr (button in lighttable mode), but this functionality is kind of limited (only works on raw/linear data because it doesn't invert a linear system of equations, and it will cause trouble with unaligned shots).
x HDR image can be used as source for LDR image series with defined EV steps
x these LDR images can be fused together.
Sometimes exposure fusion works better than global tonemapping operators, sometimes not. However, I usually prefer the fusion for its simplicity and natural look - as a final adjustment, it is enough to use lightness curve to increase overall contrast or reconsider, which source image exposure variants should be skipped.
I'm still unable to understand the global tonemap, can't find it on the version 1.0.5 for Ubuntu. Where is your notice on it in your blogpost?
Extremely sorry, I am quite a newbie to Darktable. I am getting my HDR images with pink skies.
Help would be really appreciated.
Thanks, Gio.
There is a imagestack aligning process you need to perform on handheld brackets, darktable does not provide this and i strongly recommend to use luminance hdr to produce the hdr image as mentioned in the post that will align images for you and then save and process the exported hdr image.
What are you still here ? Go mac...