After being in the camera our pictures deserve some love and to be shared. Every photographer will tell you the joy of having a picture in the hands. At last the pixels have taken form on a piece of paper to give birth to a photography which can be put on the wall!
Though, printing is not easy, there are many technical aspects to take into account. To streamline this process darktable has been added a print module.
The print module
Nothing fancy there, just the page displayed as it will be printed on the paper. The display will show the page itself, the borders and the image properly aligned:
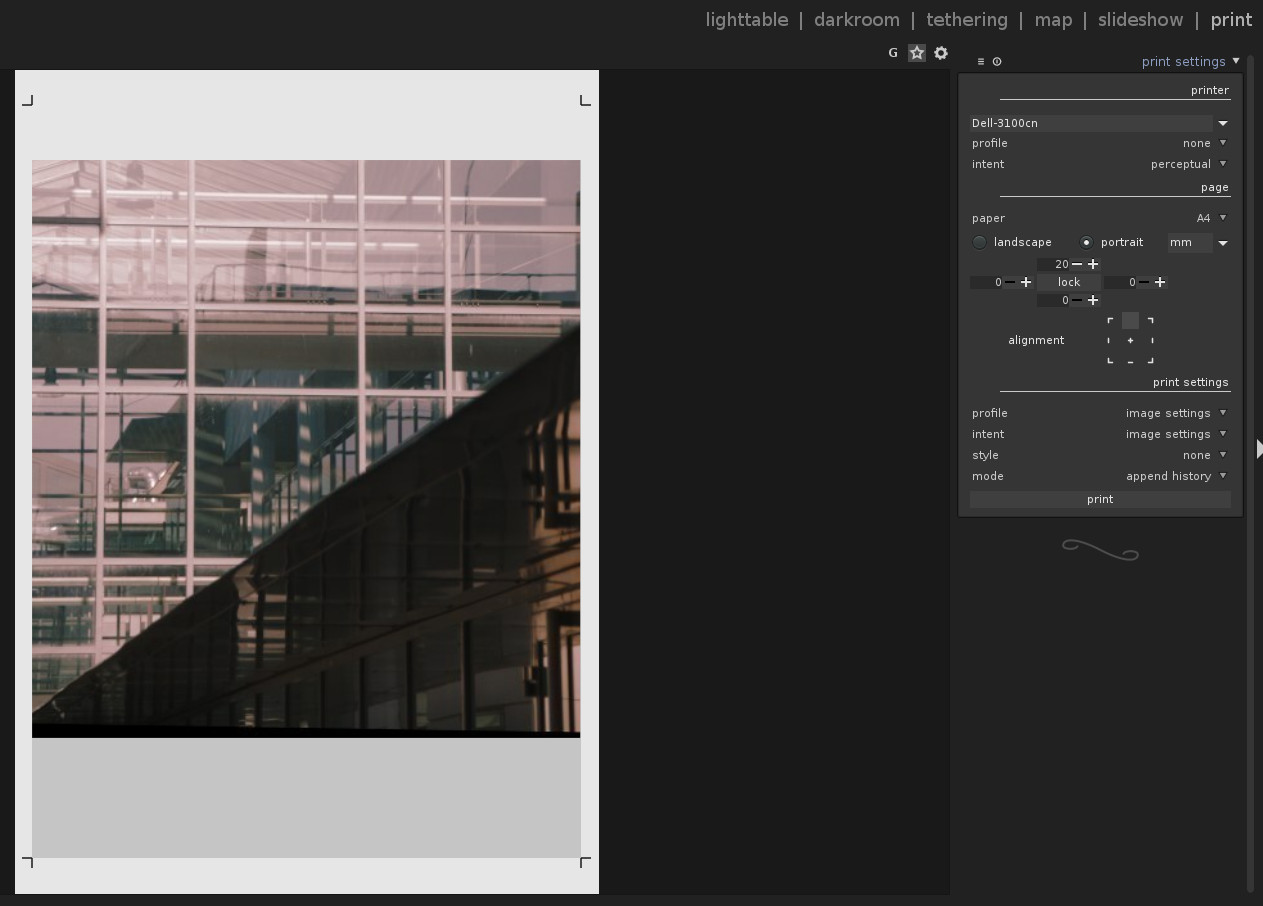
- the white area is the paper with the proper aspect ratio
- the little black markers in each corner are representing the non printable area. These markers are not displayed for printers supporting border-less mode.
- the gray area is the print area, that is, the paper minus the borders
- finally the picture take place on the print area with the proper alignment, above the alignment is set to top.
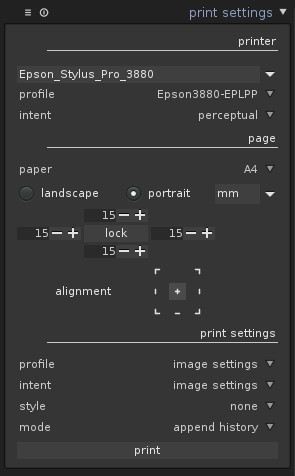
The print settings
Let’s look at the print settings offered by this module:

Using the control offered we can:
- select the printer
- set the printer profile and intent which is the most important settings
- select the paper
- set the orientation of the page either landscape or portrait
- select the unit for the border values
- set the borders or each side separately or identically using the lock button
- use one of the nine possible alignment of the picture on the page : left, right, bottom-right, centered …
- specify the way to export the picture : export profile and intent
- add a style during the export, this comes handy to add a signature or whatever watermark for example. it is also the way to adjust the exposure, indeed when printing B&W pictures it is often needed to add some lights.
This printer profile and intent is important to get correct color rendition on the print. This is the only way to ensure that the color displayed on the screen will be the one found on the paper as expected.
But be warned, a printer profile is valid for a specific paper, printer and driver. So profiles offered by vendors on the Internet cannot be used here. Indeed, if the profile match the printer and paper they have been created for the Windows or MacOS drivers. Using them won’t give you a correct print rendition. One solution is to create the profile yourself for your graphic work-flow. This is outside the scope of this article but you can read the process on another article I have written some time ago. There is also companies offering profiling for you if you prefer.
The last widget is the print button, click on it and the picture will be sent to the corresponding printer.
How to setup for using the print module?
This is an important point to note. The print module is based on CUPS. So you need to install CUPS on your machine for it to work properly.
When it is installed head your Web browser to http://localhost:631 and add your printer there. Depending on the printer there is few or a lot of parameters to configure on this interface. The important ones are:
- Uncorrected : If the printer offers different color settings select the one that does nothing. That is, asking the driver to not try to be smart at all.
- Borderless : If you intend to print borderless you need to activate this option on the CUPS interface.
Note that when you have configured the printer on CUPS you should never ever change the settings there if you are using a print profile. Indeed the print profile depends on the CUPS rendering settings. You have been warned!


Now the scanning module :D
Merci pour ton investissement dans le Libre.